Summary
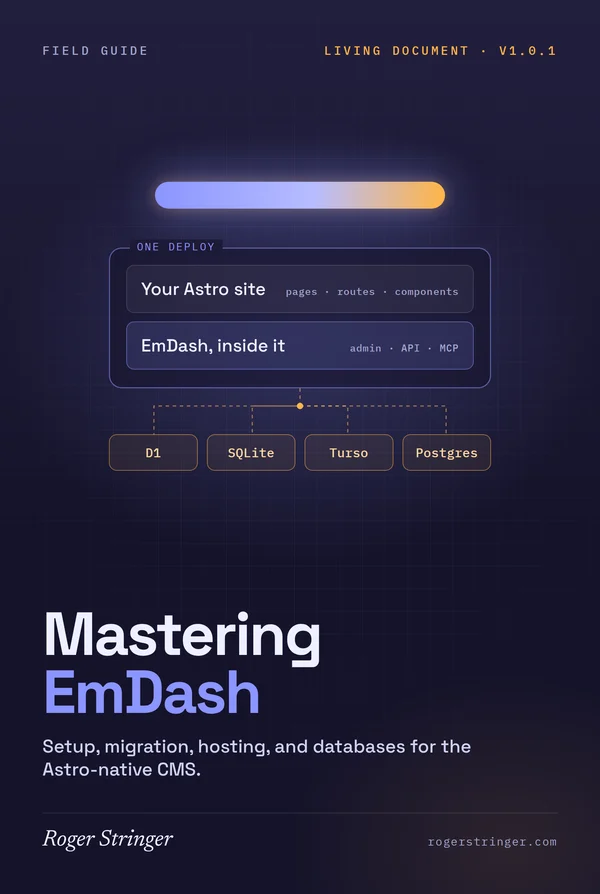
EmDash is what happens when someone rebuilds the WordPress idea from scratch for 2026: a TypeScript CMS that lives inside your Astro app, runs on Cloudflare Workers or any Node box, sandboxes its plugins, and ships an MCP server so your agents can work the content alongside you. This site runs on it now.
This is a field guide to running EmDash for real: scaffolding a site, moving your content in from WordPress (or another EmDash install), choosing where to host it, picking the right database from D1, SQLite, Turso, and Postgres, and the operational stuff nobody puts on the landing page: backups, upgrades, caching, and the gotchas that cost an afternoon if you don't know them.
This is a living document. It's current as of EmDash 1.0.1 (September 2026), and EmDash is moving fast, so I keep it up to date.
Why EmDash
Before EmDash, this site ran on Directus as a headless backend behind an Astro frontend, and that was the right call at the time. EmDash is the first CMS that made me want to collapse the whole stack back into a single thing again, and that's why this site now runs on it.
What EmDash actually is
EmDash is an open-source, MIT-licensed CMS built in TypeScript on top of Astro. The important word there is on. It is not a headless CMS you run next to your site and query over HTTP. It's an Astro integration: you add emdash() to your astro.config.mjs and your Astro app gains an admin panel at /_emdash/admin, a REST API, passkey auth, a media library, sandboxed plugins, and a built-in MCP server. Your site and your CMS are one deployment.
Content is stored in SQL (D1, SQLite, libSQL/Turso, or Postgres) as structured fields and Portable Text, and served to your pages at request time through Astro's Live Content Collections. The content model (your collections and fields) lives in the database, not in code, and you snapshot it into the repo with seed files.
Where it came from
Cloudflare launched EmDash as a beta on April 1, 2026, pitched as a "spiritual successor to WordPress" that fixes WordPress's biggest structural problem: plugins that run with full access to everything. It went 1.0 on September 28, 2026, and from 1.0 on, breaking changes only ship in major versions. The project lives in its own emdash-cms GitHub org with a broadening maintainer team, and Cloudflare moved its own blog onto it in August as a "customer zero" before calling it stable.
That last part matters to me. A CMS that its own sponsor runs a high-traffic, frequently-attacked blog on is a CMS that has had its sharp edges found by someone other than me.
Why I moved
The pitch that sold me isn't any single feature, it's the shape:
- One deploy. No separate CMS service to host, patch, and keep in sync with the frontend. The admin ships with the site.
- It's Astro all the way down. Templates are
.astrofiles, queries are plain functions, and the content arrives typed. Nothing about the frontend is dictated by the CMS. - Plugins that can't eat the site. Sandboxed plugins run in isolates with only the capabilities they declare and you approve. This is the thing WordPress never had.
- Agent-native. Every EmDash site ships an OAuth-protected MCP server. I publish, edit, and restructure content from Claude without building anything. (This guide was drafted into the CMS that way.)
- Portable hosting. Cloudflare Workers with D1 and R2 is the polished path, but plain Node with SQLite or Postgres is a first-class citizen too, so Coolify or any VPS works.
When not to use it
Being honest about fit saves you a migration. EmDash is a poor choice when:
- Several unrelated frontends need one content API. A mobile app, two websites, and a kiosk all pulling from one backend is Directus territory, not EmDash's.
- Your content must live in the repo. If Markdown in git is your workflow, keep Astro content collections. (EmDash coexists with them happily, more on that later.)
- You need a deep plugin ecosystem today. The registry launched with 1.0. It's days old. Plan to write the odd plugin yourself.
If none of those describe you, and especially if you're already on Astro, read on. The next chapter gets a site running in about five minutes.
EmDash in Five Minutes
The fastest way to understand EmDash is to have one running in front of you, so let's do that first and explain it after.
Prerequisites
You need Node.js 22.16 or later (some older doc mirrors say 22.12; use 22.16+) and a package manager. On Node 22 you'll see an ExperimentalWarning about the built-in SQLite driver. It's harmless, and it goes away on Node 24.
Scaffold a site
npm create emdash@latest
cd my-emdash-site
npm run dev
The scaffolder asks for a project name, a deploy target (Node.js or Cloudflare), a template, and your package manager. It also generates an EMDASH_ENCRYPTION_KEY into a gitignored .env. Pick Node.js for your first run even if you're headed to Cloudflare. It's the lowest-friction way to poke around locally.
Open http://localhost:4321/_emdash/admin/. A fresh site drops you into a setup wizard: site title and tagline, whether to start with sample content, an empty site, or an import, then your email, name, and a passkey. That's it. You're in.
Or start from a template
The official templates come in local and Cloudflare flavors for a blog, a portfolio, and a marketing site:
npm create astro@latest -- --template @emdash-cms/template-blog-cloudflare
npm create astro@latest -- --template @emdash-cms/template-portfolio-cloudflare
npm create astro@latest -- --template @emdash-cms/template-marketing-cloudflare
Every template ships with agent skills baked in, so if you work with a coding agent, you can also just point it at https://docs.emdashcms.com/llms.txt and tell it to help you build a site. If you'd rather not install anything yet, try.emdashcms.com is a browser playground.
Adding EmDash to an existing Astro project
This is the path I care about most, because it's how you migrate a real Astro site. Install the pieces:
npm install emdash @astrojs/node @astrojs/reactThen wire it into your config. EmDash needs server output, and the admin UI is React, so React goes in even if your site doesn't use it:
// astro.config.mjs
import node from "@astrojs/node";
import react from "@astrojs/react";
import { defineConfig } from "astro/config";
import emdash, { local } from "emdash/astro";
import { sqlite } from "emdash/db";

export default defineConfig({
  output: "server",
  adapter: node({ mode: "standalone" }),
  integrations: [
    react(),
    emdash({
      database: sqlite({ url: "file:./data.db" }),
      storage: local({ directory: "./uploads", baseUrl: "/_emdash/api/media/file" }),
    }),
  ],
});
And register the loader:
// src/live.config.ts
import { defineLiveCollection } from "astro:content";
import { emdashLoader } from "emdash/runtime";

export const collections = {
  _emdash: defineLiveCollection({ loader: emdashLoader() }),
};
That single _emdash live collection routes to every content type you create. You don't declare collections in code; you create them in the admin, and they just appear.
What got generated
astro.config.mjs: SSR, the adapter, React, and theemdash()integration.src/live.config.ts: the Live Collections loader.seed/seed.json: your collections, fields, taxonomies, menus, redirects, widget areas, settings, and optional sample content.emdash-env.d.ts: generated types for your collections, refreshed automatically in dev..emdash/:types.ts,schema.json, andmigrations.json(a secret-free migration manifest written at build time)..env: holdsEMDASH_ENCRYPTION_KEY. Never commit it, and back it up. More on why in the config chapter.
You now have a working CMS. Before you start pouring content in, the next chapter gives you the mental model that makes everything else make sense.
How EmDash Is Put Together
The single most useful thing to understand about EmDash is where things live, because it's different from both WordPress and a headless CMS.
The CMS runs inside your site
With a headless CMS like Directus, you have two services: the CMS with its own database and API, and your frontend that fetches from it. EmDash collapses that. The admin, the API, auth, and the content runtime all ship inside your Astro deployment. When a page renders, it calls a function that reads straight from the database your site is bound to. There's no second service to keep up, and no network hop between your page and your content.
The model lives in the database
In Astro content collections, your schema is Zod in code. In EmDash, your collections and fields live in the database. You create a "Posts" collection and add fields in the admin under Content Types, and it's live immediately. Each collection gets its own table (ec_posts, ec_guides, and so on), and changing a field runs a real ALTER TABLE.
That's great for editors, and it raises an obvious question: how does the model get into git? The answer is seed files. npx emdash export-seed > .emdash/seed.json snapshots your collections, fields, taxonomies, menus, redirects, and settings into the repo. A new environment boots from the seed.
The gotcha worth burning into memory: seeds are for bootstrap only. Deploying a changed seed against a database that already exists does nothing. Once a site is live, the model evolves through the admin, the CLI, or the API, and you re-export the seed to keep the repo honest.
The building blocks
- Collections are your content types: posts, pages, guides, recipes. Each can switch on drafts, revisions, scheduling, search, SEO, comments, and preview.
- Fields are the typed columns: strings, text, Portable Text, images, files, references, selects, JSON, and block fields.
- Block types let one field hold an ordered list of structured blocks. This guide is one: a
chaptersfield where each block is a chapter with a title, an anchor, and a body. - Taxonomies: categories and tags, hierarchical or flat.
- Menus, widget areas, and sections: navigation, sidebars, and reusable content blocks.
- Bylines: authors, including guest bylines who don't have accounts.
- Site settings: title, tagline, logo, and the like.
Rich text is Portable Text
Body content is stored as Portable Text, a JSON representation of rich text, not HTML. You render it with the <PortableText /> component and can swap in your own components for any block type. Anything that can't be expressed cleanly (a legacy page-builder blob, say) lands in an HTML block. For agents and the CLI, you can write Markdown and EmDash converts it for you, which is exactly how this guide got written.
Drafts, revisions, and concurrency
Entries move draft to published (or scheduled). On a published entry, edits are staged as a draft until you publish again, so you can work on a live page without touching what visitors see. Every entry carries a _rev token; updates must pass the current one, and a stale token gets a conflict instead of silently overwriting someone else's edit. Preview links are HMAC-signed so you can share an unpublished draft safely.
With that picture in your head, the config options in the next chapter will read like a list of switches, not a wall of settings.
The Config That Matters
EmDash has a lot of options. Most of them you'll never touch. This chapter is the handful that actually matter.
Environment variables
EMDASH_ENCRYPTION_KEY: encrypts plugin secrets at rest. Formatemdash_enc_v1_...; generate one withnpx emdash secrets generate. Back this up somewhere safe. Lose it and any encrypted plugin secrets are unrecoverable, and it isn't in EmDash's own backups.EMDASH_SITE_URL(falls back toSITE_URL): your public origin. Read the next section before you skip this one.EMDASH_ALLOWED_ORIGINS: extra origins allowed to use passkeys, for setups spanning subdomains.EMDASH_DATABASE_URL: overrides the database URL.EMDASH_PREVIEW_SECRETandEMDASH_IP_SALT: optional; auto-generated and stored in the database if you don't set them.EMDASH_URLandEMDASH_TOKEN: point the CLI at a remote site.
siteUrl: the one that bites behind a proxy
If your site sits behind a TLS-terminating reverse proxy (Coolify, Traefik, Caddy, nginx), always set siteUrl in the config or EMDASH_SITE_URL in the environment. Without it, EmDash sees the internal http:// origin, and a surprising amount breaks: passkeys and CSRF origin checks, OAuth and login redirects, MCP discovery, snapshot exports, and your sitemap, robots.txt, and JSON-LD. While you're there, configure trustedProxyHeaders so rate limiting sees real client IPs instead of your proxy's.
This is the most common "it worked locally" failure I see. It costs an hour if you don't know it and thirty seconds if you do.
Authentication
The default login is passkeys. Register at least two, on two different devices, the day you set a site up. Beyond that, you can layer on:
- Magic links: single-use, 15-minute email links. Needs email configured.
- OAuth:
authProviders: [github(), google()], readingEMDASH_OAUTH_GITHUB_CLIENT_ID/_SECRETand the Google equivalents. The Google callback is/_emdash/api/auth/oauth/google/callback. - Atmosphere: log in with an AT Protocol (Bluesky) identity via
@emdash-cms/auth-atproto. - Cloudflare Access: put the admin behind your Zero Trust policies.
import { access } from "@emdash-cms/cloudflare";

emdash({
  auth: access({
    teamDomain: "myteam.cloudflareaccess.com",
    audienceEnvVar: "CF_ACCESS_AUDIENCE",
    roleMapping: { Admins: 50, Editors: 40 },
  }),
});
Be clear-eyed about that last one: an auth adapter like Access becomes the only login method. Passkeys, OAuth, magic links, self-signup, and invites all switch off, and user management moves to your Access policies.
The CLI you'll actually use
The CLI is npx emdash (also available as em). The commands worth knowing:
npx emdash login --url https://example.com   # OAuth device flow
npx emdash types                               # regenerate collection types
npx emdash content list posts --status published --limit 10
npx emdash content get posts hello-world --published
npx emdash content create posts --file post.json --slug hello-world
npx emdash export-seed > .emdash/seed.json     # snapshot the model into git
npx emdash seed --validate                     # check a seed file
npx emdash doctor                              # health checks
npx emdash migrate --check                     # are core migrations pending?
npx emdash secrets generate                    # new encryption key
The CLI resolves auth in this order: --token, then EMDASH_TOKEN, then stored credentials, then a dev bypass on localhost. Note that 1.0 removed emdash dev and emdash auth secret; just use your normal dev script.
Separate databases per environment
One rule that isn't a setting but should be: give every environment its own database. A preview deploy pointed at production can run migrations or destructive schema changes against live data. Previews get a preview database, full stop.
Migrating from WordPress
EmDash was designed as a WordPress successor, so the WordPress path is the most complete migration story it has, and it's built right into the admin.
Before you start
- Back up the WordPress database and
wp-content/uploads. - Configure storage on the EmDash side first (media gets pulled in during the import).
- Use an admin account; importing needs the
import:executepermission. - Write down what the importer can't discover for you: your permalink structure, existing redirects, menus, custom post types, and any fields owned by plugins like ACF.
Pick your import method
WXR upload. In WordPress, go to Tools, then Export, then All content, and upload the resulting XML. This brings posts, pages, custom post types, terms, reusable blocks, and authors, plus attachment URLs (the files themselves come in a later step). Use this when export is all you have.
The EmDash Exporter plugin. Install it on the WordPress site, then either generate a migration key under Tools, then EmDash Migration, or use an application password. This is the better path whenever you control the WordPress site: on top of what WXR gives you, it brings comments, menus, site settings, Yoast or Rank Math SEO data, ACF and custom meta, custom taxonomies, and media metadata.
There's also a URL-only probe, which counts public content without importing anything. Useful for scoping, nothing more.
Run the import
- Open
/_emdash/admin/import/wordpressand upload the WXR, paste the migration key, or enter the URL. - Review the analysis for each post type: which collection it maps to, required fields, and compatibility.
- Map WordPress authors to EmDash users. Anyone you don't map becomes a guest byline.
- For exporter imports, choose whether to bring menus, title and tagline, logo and favicon, and SEO.
- Run it. Missing compatible collections and fields are created for you.
- Run the media step: files are downloaded, stored through your storage adapter, and URLs in your content are rewritten.
How things map
- Status:
publishbecomes published. Everything else (draft, pending, private, future, trash) becomes a draft. Scheduled posts do not keep their schedule; reschedule them by hand. - Content: Gutenberg and Classic HTML are converted to Portable Text. Anything that won't convert cleanly becomes an HTML block. Reusable blocks become Sections.
- Collections:
postgoes toposts,pagetopages, and custom post types get a sanitized slug. A field type mismatch blocks that mapping rather than silently coercing your data. - Custom fields: WXR analysis reports your meta keys but doesn't copy arbitrary meta. The exporter plugin can.
- Taxonomies: categories and tags come across. A custom taxonomy in a WXR file with no matching EmDash definition is skipped.
- Media: deduplicated by content hash. The old site has to stay online until the media step finishes.
- Multilingual: WPML and Polylang translation groups aren't in WXR, so everything lands in the default locale.
Re-running an import skips entries that already exist, matched on collection, slug, and locale (not WordPress ID), so it's safe to run again after fixing a problem.
Themes and plugins don't come with you
EmDash doesn't run PHP. Your theme becomes Astro pages and components (the docs have a "Porting WordPress Themes" guide, and the bundled agent skills are good at the grunt work), and plugins get ported to EmDash plugins. The concept map makes the port less scary than it sounds:
- Post type becomes a collection; post meta becomes a field.
WP_Queryandget_post()becomegetEmDashCollection()andgetEmDashEntry().the_content()becomes<PortableText />.- The template hierarchy becomes
src/pages/. wp_nav_menu()becomesgetMenu(); sidebars become widget areas.- The Options API becomes site settings (or a plugin's own key-value store).
Before you cut over
- Compare counts by type and status between the two sites.
- Spot-check anything built with shortcodes or a page builder. That's where HTML blocks pile up.
- Crawl the old site's URLs and set up redirects under Redirects in the admin (301, 302, 307, and 308 are supported, and you can define them in seed files too).
- Confirm drafts are invisible to logged-out visitors.
- After launch, watch EmDash's 404 log. It's the fastest way to find the URLs your crawl missed.
Keep the WordPress site around until you're sure you won't need to roll back.
Moving Between EmDash Sites (and Everything Else)
Once you're on EmDash, you'll eventually want to move a site: to a new host, a new database, or from staging to production. That's what Site Transfer is for, and it's the feature I'd have killed for in every previous CMS.
Site Transfer
Site Transfer exports an entire site as a single .emdash package and imports it into an empty EmDash site. Crucially, the source and target don't have to match: D1 to Postgres, SQLite to D1, Node to Cloudflare. It's the supported way to change databases.
It's a three-step flow, and the middle step is the clever part:
# 1. Export from the old site
emdash site export --output site.emdash --url https://old.example.com

# 2. Analyze against the new site (produces a plan digest)
emdash site import site.emdash --analyze --url https://new.example.com \
  --map-principal old@example.com=new@example.com

# 3. Import, bound to that exact plan
emdash site import site.emdash --plan sha256:... --confirm --url https://new.example.com
The analyze step checks references, unique keys, column types, and locales against the target and produces a plan digest. The import only runs against that exact plan, so nothing changes between what you reviewed and what executes. Exports are atomic and resumable, and restart automatically if someone writes to the site mid-export. Imports block writes while they run and finish with a verifiable receipt.
When things go sideways, you have the controls you'd want:
emdash site import status <operation-id>
emdash site import resume <operation-id>
emdash site import receipt <operation-id>
emdash site import cancel <operation-id>
A few details worth knowing:
- The admin UI lives at Settings, then Transfer.
- API tokens need the
transfer:export,transfer:analyze, andtransfer:executescopes (theadminscope includes all three). --no-commentsleaves comments behind;--use-target-titleand--use-target-taglinekeep the new site's branding.- Agents can drive it too, over MCP, with the
site_export_*andsite_import_*tools. - Known issue: an import fails with
TRANSFER_TARGET_NOT_EMPTYif a collection deletion is still in progress on the target. Let it finish first.
From Directus, Ghost, and other headless CMSs
There's no first-party importer for these yet. The path is straightforward, just manual:
- Model first. Create the collections and fields in the admin, or write a seed file.
- Export the source to JSON through its API.
- Convert rich text. Markdown and HTML both work: Markdown converts to Portable Text automatically when you write through the CLI or MCP, and raw HTML can go into HTML blocks.
- Load it.
emdash content create posts --file ..., the REST API, or, my favorite, hand the JSON to an agent connected over MCP and let it do the loop. - Re-upload media through
emdash mediaor the API, and recreate your redirects.
From Markdown and Astro content collections
Here's the good news: you might not need to migrate at all. EmDash's live collection sits alongside regular Astro content collections. Keep getCollection("docs") for developer-owned Markdown in the repo, and use getEmDashCollection("posts") for the editor-owned stuff. Move content over when there's a reason to, not because a migration plan says so.
Hosting on Cloudflare
Cloudflare Workers with D1 and R2 is EmDash's reference deployment. It's where the features are most polished, and it's the only place some of them (like sandboxed plugins on D1) work without extra moving parts.
wrangler.jsonc
{
  "name": "my-emdash-site",
  "main": "./src/worker.ts",
  "compatibility_date": "2026-02-24",
  "compatibility_flags": ["nodejs_compat"],
  "d1_databases": [{ "binding": "DB", "database_name": "my-emdash-site" }],
  "r2_buckets": [{ "binding": "MEDIA", "bucket_name": "my-emdash-media" }],
  "worker_loaders": [{ "binding": "LOADER" }],
  "triggers": { "crons": ["* * * * *"] }
}
The worker_loaders binding is only needed for sandboxed plugins. The cron trigger is what runs scheduled publishing, backups, and plugin tasks, so don't leave it out.
astro.config.mjs and the worker
import cloudflare from "@astrojs/cloudflare";
import react from "@astrojs/react";
import { defineConfig } from "astro/config";
import emdash from "emdash/astro";
import { d1, r2, sandbox } from "@emdash-cms/cloudflare";

export default defineConfig({
  output: "server",
  adapter: cloudflare(),
  integrations: [
    react(),
    emdash({
      database: d1({ binding: "DB" }),
      storage: r2({ binding: "MEDIA" }),
      sandboxRunner: sandbox(),
    }),
  ],
});
// src/worker.ts
import handler, { createScheduledHandler, PluginBridge } from "@emdash-cms/cloudflare/worker";
export { PluginBridge };
export default { ...handler, scheduled: createScheduledHandler() } satisfies ExportedHandler;Deploy
pnpm wrangler login
pnpm build && pnpm wrangler deploy
The first deploy provisions D1 and R2, and core migrations run on the first request. For a custom domain, add "routes": [{ "pattern": "www.example.com", "custom_domain": true }] and redeploy.
For previews, create separate resources and a preview environment, and set CLOUDFLARE_ENV during the build:
wrangler d1 create my-emdash-site-preview
wrangler r2 bucket create my-emdash-media-preview
wrangler deploy --env preview
Making it fast
Server-rendered pages make several D1 round trips, so a little tuning goes a long way:
- Targeted Placement. Run the Worker near your D1 primary. If you do this, don't also turn on D1 read replicas; you'd be optimizing in two directions at once.
- KV object cache. Create a namespace (
wrangler kv namespace create CACHE) and addobjectCache: kvCache({ binding: "CACHE" }). Edits in the admin and API invalidate it automatically. - Workers Cache in front of the Worker. Use
cache: { provider: cacheCloudflare() }from@astrojs/cloudflare/cachewithrouteRuleslike"/": { maxAge: 300, swr: 86400 }, and purge by tag withcache.purge({ tags: ["posts"] }). (In 1.0 this replaced the oldcloudflareCache().)
Two cache gotchas that will bite you: responses with no Cache-Control header still get cached heuristically (a 200 for two hours), and logged-in editors can be served the cached anonymous page. Be explicit about what's cacheable.
Cost and limits
- Sandboxed plugins need a paid Workers plan (from $5/month), because Dynamic Worker Loaders are paid-only. On the free plan, comment out the
worker_loadersblock. - Images are resized through the
IMAGESbinding and billed as Images transformations. The free allowance is 5,000 unique transformations a month; past that, new transforms fail with error9422. - Public R2 buckets: if you set a
publicUrlfor media, make sure thebackups/prefix isn't exposed. Automatic backups live in the same bucket.
For a sense of scale: the Cloudflare blog runs this exact shape (Workers Cache, a KV object cache, and Hyperdrive to Postgres) and was built to handle traffic spikes in the thousands of requests per second.
Hosting on Node, Docker, and Coolify
If Cloudflare isn't your thing, or you already have a box, EmDash runs happily on plain Node. This is a first-class path, not an afterthought.
Build and run
npm run build
node --env-file=.env ./dist/server/entry.mjs
Note the --env-file flag. The standalone entry doesn't load .env on its own, and forgetting that is a classic first-deploy head-scratcher.
Docker
FROM node:22-alpine AS builder
WORKDIR /app
COPY package*.json ./
RUN npm ci
COPY . .
RUN npm run build

FROM node:22-alpine
WORKDIR /app
COPY --from=builder /app/dist ./dist
COPY --from=builder /app/node_modules ./node_modules
COPY --from=builder /app/package.json ./
RUN mkdir -p data
ENV HOST=0.0.0.0 PORT=4321
EXPOSE 4321
CMD ["node", "./dist/server/entry.mjs"]
docker run -p 4321:4321 -v emdash-data:/app/data my-emdash-siteIf you're on SQLite and local media, that volume is your whole site. Treat it accordingly.
Coolify
There's no dedicated Coolify guide in the EmDash docs, but it's the Dockerfile above plus four things. (If Coolify itself is new to you, The Boring Stack walks through setting it up on a VPS from scratch.)
- Mount a persistent volume at
/app/data. - Set
EMDASH_ENCRYPTION_KEYandEMDASH_SITE_URLas secrets. The site URL is not optional behind Coolify's proxy; see the config chapter. - Add a health route (
src/pages/health.tsreturning 200) and point Coolify's health check at it. Know that it only proves the process is up, not that the database and storage are healthy. - If you'll run more than one instance, switch from SQLite to Postgres.
Keep one process alive
On Node, EmDash's scheduler (scheduled publishing, backups, plugin crons) runs inside the process. If every process stops or sleeps, the scheduler pauses with it. That rules out scale-to-zero hosting unless you move scheduling elsewhere. An always-on container on Coolify or a VPS is exactly right.
Sandboxed plugins on Node
Install @emdash-cms/sandbox-workerd and its workerd peer, and sandboxed plugins run in a workerd child process. The one difference from Cloudflare: only wall-time limits are enforced on Node, where Cloudflare also enforces CPU and subrequest limits.
Railway, Fly, Vercel, and Netlify
- Railway and Fly run long-lived containers, so the Docker recipe works as-is. Attach a volume or use managed Postgres.
- Vercel and Netlify show up in community write-ups, but they aren't in the official deployment docs. Their ephemeral filesystems rule out SQLite and local media (use Postgres or libSQL and S3), and serverless functions have no always-on scheduler. Treat them as unverified and test before you trust them.
Choosing a Database
EmDash supports five database adapters, and the right one falls out of two questions: where are you hosting, and how many processes need to share the data?
The short version
- SQLite (
sqlitefromemdash/db): one Node process with a persistent disk. The simplest thing that works, and plenty for a personal site. - D1 (
d1from@emdash-cms/cloudflare): Workers plus Cloudflare's SQL. The default for Cloudflare templates. - Hyperdrive (
hyperdrivefrom@emdash-cms/cloudflare): Workers plus an existing Postgres, like PlanetScale or Neon. - PostgreSQL (
postgresfromemdash/db): several Node processes sharing one database. - libSQL / Turso (
libsqlfromemdash/db): a remote, SQLite-compatible database from Node.
SQLite
database: sqlite({ url: `file:${process.env.DATABASE_PATH}` })EmDash runs SQLite in WAL mode. Keep the file on local or block storage, never on a network share (NFS or SMB), where SQLite's locking assumptions fall apart.
D1
database: d1({ binding: "DB", session: "auto" })session controls read replication: "disabled" (the default), "auto", or "primary-first". Replication also has to be switched on for the D1 database itself.
The gotcha: the global_fetch_strictly_public compatibility flag makes every server-rendered request hang silently when sessions are on, and sometimes only after the replicas finish provisioning, so it can look fine for a day and then fall over. If you need that flag, leave session disabled.
libSQL and Turso
database: libsql({
  url: process.env.LIBSQL_DATABASE_URL,
  authToken: process.env.LIBSQL_AUTH_TOKEN,
})
Migrations read their token from TURSO_AUTH_TOKEN by default (configurable with migrationAuthTokenEnv). Locally, libsql({ url: "file:./data.db" }) gives you plain SQLite with the same adapter.
PostgreSQL
npm install pgdatabase: postgres({
connectionString: process.env.DATABASE_URL,
pool: { min: 2, max: 20, connectionTimeoutMillis: 5000 },
})The thing to get right on day one is roles. Use one stable, non-expiring role that owns every EmDash table and has USAGE and CREATE on the schema. EmDash creates an ec_* table per collection and runs ALTER TABLE when you change fields, so if you switch roles later you'll get must be owner of table errors. Also, EmDash uses current_schema() and never sets search_path itself, so if you want a dedicated schema, set it up before first boot:
CREATE SCHEMA emdash AUTHORIZATION emdash_app;
ALTER ROLE emdash_app IN DATABASE app SET search_path = emdash;
Hyperdrive
database: hyperdrive({ binding: "HYPERDRIVE", cachedBinding: "HYPERDRIVE_CACHED" })Requirements: pg 8.16.3 or later, nodejs_compat, and a compatibility date of 2024-09-23 or later. Two things to know:
- Create the primary binding with
--caching-disabled. With caching on, first-run setup breaks ("collection already exists", half-created tables) and editors see stale content. - For cached anonymous reads, add a second, cached binding over the same role and set
preferUncachedAfterWriteMs(60 seconds by default) to match itsmax_age.
The big trade-off: sandboxed plugins are D1-only, so they're unavailable when you run on Hyperdrive.
Migrations
Core migrations run automatically on the first request by default. In CI you can run them ahead of traffic instead: npx emdash migrate --check exits with 2 when migrations are pending and 3 on unknown records, and npx emdash migrate applies them. There's no down migration and no dry run, and after an upgrade you need to rebuild, because emdash migrate rejects manifests written by an older version.
Switching databases later
Use Site Transfer (see the migration chapter). It's the supported way to go from, say, D1 to Postgres. If you just want the schema out of D1 as a seed:
npx wrangler d1 export emdash-db --remote --output=./prod.sql
sqlite3 prod.db < prod.sql
npx emdash export-seed --database prod.db > .emdash/seed.json
Media and Storage
Media storage is its own adapter, independent of the database, and the choice is mostly dictated by where you host.
The three options
import emdash, { local, s3 } from "emdash/astro";
import { r2 } from "@emdash-cms/cloudflare";

// Local disk: dev, or a single server with a persistent volume
storage: local({ directory: "./uploads", baseUrl: "/_emdash/api/media/file" })

// R2 binding: Cloudflare Workers
storage: r2({ binding: "MEDIA", publicUrl: "https://media.example.com" })

// S3-compatible: Node (R2, MinIO, AWS S3, etc.)
storage: s3()
S3-compatible storage on Node
s3() with no arguments reads S3_ENDPOINT, S3_BUCKET, S3_ACCESS_KEY_ID, S3_SECRET_ACCESS_KEY, S3_REGION (defaults to auto), and S3_PUBLIC_URL from the environment. You can also pass them explicitly, which is how you'd point a Node deployment at R2:
storage: s3({
  endpoint: "https://<account-id>.r2.cloudflarestorage.com",
  bucket: "emdash-media",
  accessKeyId: process.env.R2_ACCESS_KEY_ID,
  secretAccessKey: process.env.R2_SECRET_ACCESS_KEY,
})
It needs @aws-sdk/client-s3 and @aws-sdk/s3-request-presigner installed.
The gotcha: the environment-variable form is Node only. Workers don't expose secrets through process.env, so on Cloudflare use the r2() binding or pass values explicitly.
Other things worth knowing
- The default upload limit is 10 MB per file.
- Cloudflare Images and Stream can be added as media providers.
- Media gets deduplicated on import, and the media library tracks where each file is used.
- EmDash backups include media metadata but not the files themselves. Back up the bucket or uploads volume separately (more on this in the operations chapter).
Querying Content in Astro
This is the part that makes EmDash feel like home if you already write Astro: querying content is just calling functions in your frontmatter.
Collections and entries
---
import { getEmDashCollection, getEmDashEntry, decodeSlug } from "emdash";
import { PortableText } from "emdash/ui";

const { entries: posts, cacheHint, hasMore, nextCursor } = await getEmDashCollection("posts", {
  orderBy: { published_at: "desc" },
  limit: 10,
  where: { category: "news" },
});

if (Astro.cache?.enabled) Astro.cache.set(cacheHint);
---
For a single entry:
---
const { entry: post, isPreview } = await getEmDashEntry("posts", decodeSlug(Astro.params.slug));
if (!post) return Astro.redirect("/404");
---
<h1>{post.data.title}</h1>
<PortableText value={post.data.content} />
Two IDs to keep straight: entry.id is the route identifier (normally the slug), while entry.data.id is the stable ULID that relations and taxonomy helpers use. Pagination works with either offsets or the nextCursor you get back.
The rest of the helpers
getMenu()for navigation.getTerm(),getTaxonomyTerms(),getEntryTerms(), andgetEntriesByTerm()for categories and tags.getWidgetArea()for sidebars and footer regions.getTranslations()for i18n.getSeoMeta()plus<EmDashHead>in your layout, which emits SEO tags and anything plugins contribute to the head.
Internationalization
EmDash reads Astro's own i18n config:
i18n: {
  defaultLocale: "en",
  locales: ["en", "fr", "es"],
  fallback: { fr: "en", es: "en" },
}
Each locale is its own row, linked by a translation group, and fields are translatable by default. Query with locale: Astro.currentLocale.
The gotcha: prefixDefaultLocale: true (or "prefix-always") makes /_emdash/admin return a 404. If you need prefixed default-locale URLs, handle it with a redirect at the front instead.
Other features
- Per-entry SEO fields, a generated sitemap, robots.txt, and JSON-LD.
- Redirects and a 404 log in the admin.
- Built-in full-text search per collection (Cloudflare AI Search is an option too).
- Comments with moderation, if you want them.
- x402 payments, for charging agents to read content.
Plugins and the Sandbox
Plugins are where EmDash most clearly isn't WordPress. A WordPress plugin can read your database, your filesystem, and every other plugin's secrets. An EmDash sandboxed plugin can't do any of that unless you let it.
Two kinds of plugins
Sandboxed plugins are the default. They're defined by an emdash-plugin.jsonc manifest plus src/plugin.ts, and they run in isolates: Dynamic Worker Loaders on Cloudflare, a workerd child process on Node. A sandboxed plugin:
- gets only the capabilities it declares and you approve at install time,
- has no access to environment variables, the filesystem, or other plugins' storage,
- can only make network requests to hosts it declares,
- builds its admin UI with Block Kit.
You install them from the registry or list them under sandboxed: [] in your config.
Native plugins use definePlugin() under plugins: []. They run in-process with full access, and you reach for them when you need things the sandbox can't do: React admin pages, custom Portable Text components, or page fragments. Treat them with the same trust you'd give your own code, because that's effectively what they are.
One important caveat: if you don't have a sandbox runner configured, every plugin effectively runs with native trust. The security model only holds when the sandbox is actually on.
Where sandboxing is available
- Cloudflare with D1: yes, on a paid Workers plan.
- Cloudflare with Hyperdrive: no. Sandboxed plugins are D1-only.
- Node: yes, with
@emdash-cms/sandbox-workerdinstalled (wall-time limits only).
The registry
The plugin registry launched alongside 1.0 and is built on the AT Protocol. The default store is plugins.emdashcms.com, labelers can moderate what shows up, and anyone can publish from their own Atmosphere account. Configure it with the top-level registry option (1.0 moved it out of experimental), and consider a cooling-off period for new releases:
emdash({
  registry: { minimumReleaseAge: "48h" },
});
Updates that add permissions or MCP tools require re-approval, so a plugin can't quietly widen its access.
Be thoughtful about what you approve, though. Approved permissions authorize real actions: redirects:write, for example, lets a plugin change where your visitors end up. The sandbox limits the blast radius to what you granted. It doesn't make the grant harmless.
Agents, MCP, and the API
This is my favorite part of EmDash, and the reason this guide exists in the shape it does: every EmDash site ships its own MCP server, so an AI agent can work your content with the same permissions you'd give a human editor.
The MCP server
It lives at https://your-site/_emdash/api/mcp. It's on by default (turn it off with mcp: false), and it always requires authentication: OAuth 2.1 with PKCE and a device flow, discoverable at /.well-known/oauth-protected-resource. Scopes like content:read gate each tool, so you can hand an agent exactly as much access as the job needs.
The tools cover practically everything you do in the admin:
- Content: list, get, create, update, publish, unpublish, schedule, duplicate, compare, translations, trash and restore.
- Schema: collections, fields, and block types.
- Media: upload, update, usage repair.
- Structure: taxonomies and terms, menus, bylines, settings.
- History: revisions and restore.
- Search, plus site transfer (export and import).
It works with Claude and with ChatGPT's Pro, Business, and Enterprise plans. In practice, this is what it looks like: I connected Claude to this site, pointed it at a research report, and asked it to put the guide in as a draft with each chapter as a block. It read the Guides schema, noticed the chapters field, and wrote this guide into it as a draft, SEO fields and all. What was left for me was a read-through in the admin and hitting publish. No custom integration, no copy-paste.
Agent skills and docs
The templates ship with agent skills (also published separately in emdash-cms/skills) that teach coding agents how to work with EmDash: building pages, porting WordPress themes, writing plugins. There's also a Docs MCP, and https://docs.emdashcms.com/llms.txt is a good starting point for any agent.
The REST API
Everything is also available over plain HTTP under /_emdash/api/:
curl https://example.com/_emdash/api/content/posts?locale=fr \
  -H "Authorization: Bearer $EMDASH_TOKEN"
Between the REST API, the CLI, and MCP, you have three ways in, and they all use the same permission model. Pick whichever fits the job: MCP for conversational work, the CLI for scripts and CI, REST for everything else.
Backups, Upgrades, and Operations
Everything so far gets a site running. This chapter keeps it running.
Built-in backups
Under Settings, then Backups, EmDash can take daily automatic backups to your storage backend, keeping 1 to 30 of them. They run as part of scheduled maintenance, which on Cloudflare means the cron trigger and on Node means a live process.
What's in them: content (including drafts, scheduled, and trashed items), the content model, taxonomies, menus, widgets, sections, SEO settings, revisions, media metadata, and site settings.
What's not in them, and what you therefore need to back up yourself:
- Users, sessions, passkeys, and API tokens.
- Secrets, including your
EMDASH_ENCRYPTION_KEY. - The media files themselves. Back up the bucket or uploads volume.
Database-level backups
- SQLite: use SQLite's
.backupcommand, not a raw file copy. The-walfile holds committed data that a naive copy can miss. - D1:
wrangler d1 export, or D1's Time Travel for point-in-time restores. - Postgres:
pg_dump, on whatever schedule you already trust.
Changing the model on a live site
Deleting a field removes its values everywhere, and most field type changes need a content migration. Rehearse destructive changes on a copy first. On Cloudflare that's wrangler d1 export into a preview database; on Node, a copy of the SQLite file or a Postgres dump. Then re-export your seed so git matches reality.
Upgrading to 1.0
If you're coming from 0.42 or earlier, read the official "Upgrade to EmDash 1.0" guide, and check for these changes:
cloudflareCache()is nowcacheCloudflare()from@astrojs/cloudflare/cache.CommentsandCommentFormimport fromemdash/ui/comments.emdash devandemdash auth secretare gone.experimental.registryis now top-levelregistry.- Internal subpaths moved under
emdash/internal/*. If you only callemdash()in your config, you're unaffected. - Old-style capability names like
read:contentstill work with a warning. Rename them tocontent:read.
Then rebuild so the migration manifest regenerates, and pin exact versions if you use any experimental options.
One version-specific warning: do not install `emdash@1.0.0`. It was published by mistake from 0.7-era code and is deprecated. The stable release is 1.0.1.
EmDash vs WordPress vs Directus
I spent years with Directus, including a stint working there, and this site ran on it right up until the move to EmDash. So here's how I think about choosing between the three.
WordPress
PHP and MySQL, the largest ecosystem on the internet, GPL licensed. Its superpower is that ecosystem: there's a plugin and a theme for everything, and every freelancer knows it. Its structural weakness is the flip side: plugins run with full access, and the plugin supply chain is where most WordPress sites get compromised. Choose it when the ecosystem is the point, or when the people maintaining the site only know WordPress.
Directus
A headless data platform on Node that wraps whatever SQL database you point it at and gives you an admin and an API for it. Its superpower is being frontend-agnostic: one Directus backend can feed a website, a mobile app, and an internal tool all at once. Licensing is BSL 1.1, free below a revenue-plus-funding threshold, so check the current terms at directus.io for your situation. Choose it when several unrelated frontends need one API, or when you're modeling data that isn't really "content". If that's you, Mastering Directus is the companion to this guide.
EmDash
TypeScript on Astro, MIT licensed, and the CMS runs inside your site. Its superpowers are the single deploy, sandboxed plugins, and first-class agent access through MCP. Its weaknesses are its age: the plugin ecosystem is days old, and hosting outside Cloudflare and plain Node is still community territory. Choose it when your site is Astro, one deployment that includes the CMS sounds like a feature rather than a constraint, and you'd like your agents working the content with you.
My rule of thumb
- One Astro site, editors and agents working the content: EmDash.
- Many frontends, one API: Directus.
- The ecosystem is the requirement: WordPress.
For this site, the answer was obvious once EmDash hit 1.0.
Resources
- Docs: docs.emdashcms.com (and
llms.txtfor agents) - Code: github.com/emdash-cms/emdash, plus
wp-emdashfor the WordPress exporter andtemplates - Plugins: plugins.emdashcms.com
- Community: the Discord linked from emdashcms.com, @emdashcms.com on Bluesky, and @EmDashCMS on X
This guide will keep changing as EmDash does. If something here has drifted from reality, that's a bug. Let me know.
About Roger
I'm Roger Stringer. I build things, break them, and write up what I learned so you don't have to learn it the hard way. These Field Guides come straight out of that work.
Working on something bigger? I take on a handful of fractional CTO engagements, helping founders and teams set technical direction, build AI-powered workflows, and actually ship the hard parts. If you're wrestling with the kind of problem this guide covers and want someone in your corner who's done it before, that's exactly what I help with. Drop me a line.
And if a guide helped, got something wrong, or you just want to compare notes, I'd love to hear from you:
- Email: roger.stringer@hey.com
- X: @freekrai
- GitHub: github.com/freekrai
- LinkedIn: linkedin.com/in/rogerstringer
New guides go up as I hit problems worth documenting. Follow along wherever suits you.